This is the second article on Infrastructure as Code using well-known programming languages. The first one was focused on the AWS CDK. In this post, we will introduce Pulumi, a similar tool which offers multi-cloud support.
Infrastructure as Code (IaC) is one of the biggest revolutions in the cloud computing landscape, as it allows automating the deployment of infrastructure based on its definition in the source code. Using code as the source of truth for infrastructure has several benefits:
- Infrastructure can be versioned as source code normally is, increasing the traceability of the infrastructure deployed.
- Deployments, rollbacks and disaster recovery procedures can be easily automated, reducing the amount of human intervention, thus reducing the likelihood of errors.
- Costs are reduced, as resources can be easily resized to adapt them to the load fluctuations and environments can be switched off when they are not needed.
- Deployment processes are sped up significantly, making the software development lifecycle more efficient, as environments can be deployed when needed.
IaC can be implemented by means of several tools, being Terraform, AWS CloudFormation, Ansible, Chef or Puppet some of the most widely used ones. These tools normally rely on declarative languages (or dialects) using mostly YAML, JSON and JSON-like formatting for the infrastructure definition. Getting to work with these languages and tools can be challenging sometimes, specially for those with a more ‘Developer-like’ background.
Thus, it makes sense to deploy infrastructure using high-level languages, which are more natural to developers. This approach can increase productivity based on the fact that common development patterns can be easily reused. This way of working, enables developers to provision infrastructure easily, without needing to be an infrastructure expert. Besides, developers can provision a complete stack, applications and the underlying infrastructure, by using high-level languages in their IDE of choice. This is particularly useful in medium size and small companies and projects, where just one team is in charge of the management and operation of both the Dev and Ops parts.
Pulumi overview by Pulumi
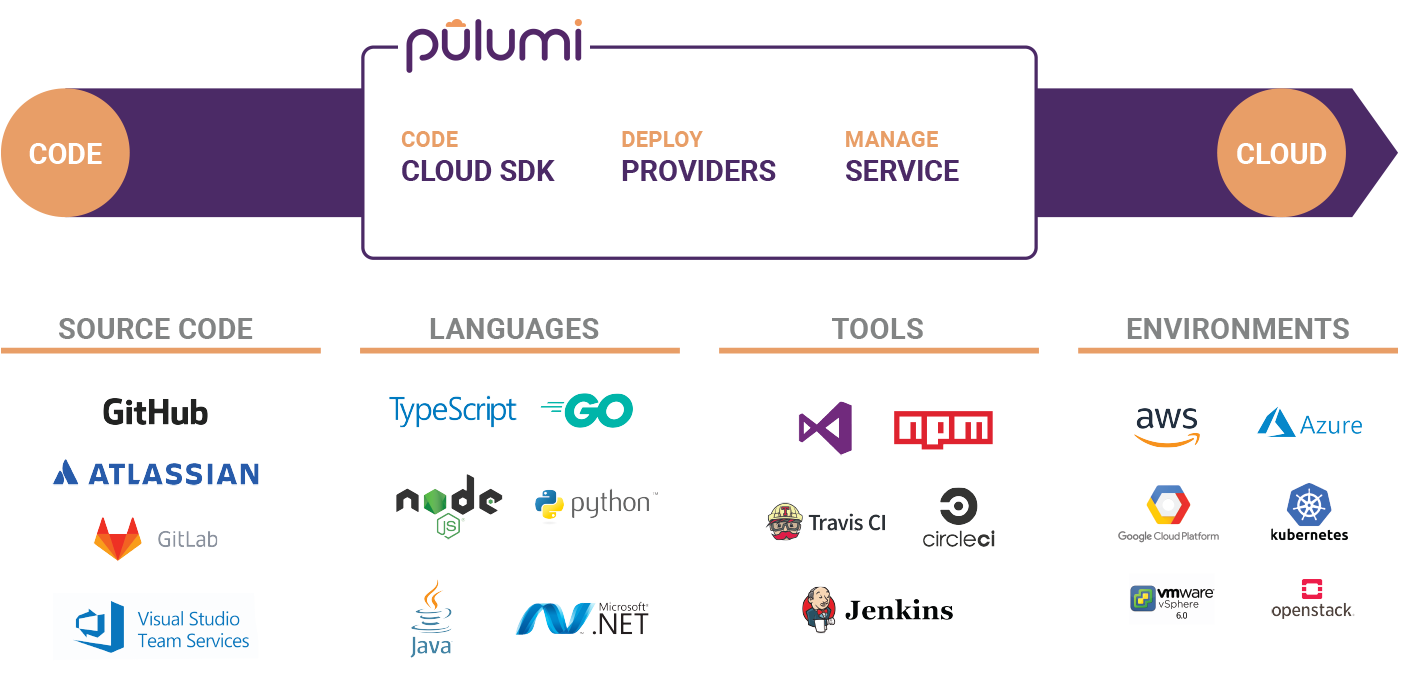
In this post, Pulumi will be introduced and reviewed. Pulumi is an open source development framework which helps creating and managing cloud infrastructure and applications by using well-known programming languages such as Typescript, Javascript, Python, Go and C#.
For the examples analyzed in this article, python was the language chosen, deploying infrastructure using different public cloud providers. You can find the code used to create the examples that are shown in this post in the Pulumi examples repository.
Setting Pulumi up⚙️
The first step is to install Python 3, specifically Python 3.6 or later versions. You can get Python 3 latest version for your OS here. Once Python 3 is installed, the next step will be getting Pulumi installed in your machine. For Linux distributions, issue the following command. For other OSs, you can find the installation steps here.
curl -fsSL https://get.pulumi.com | sh
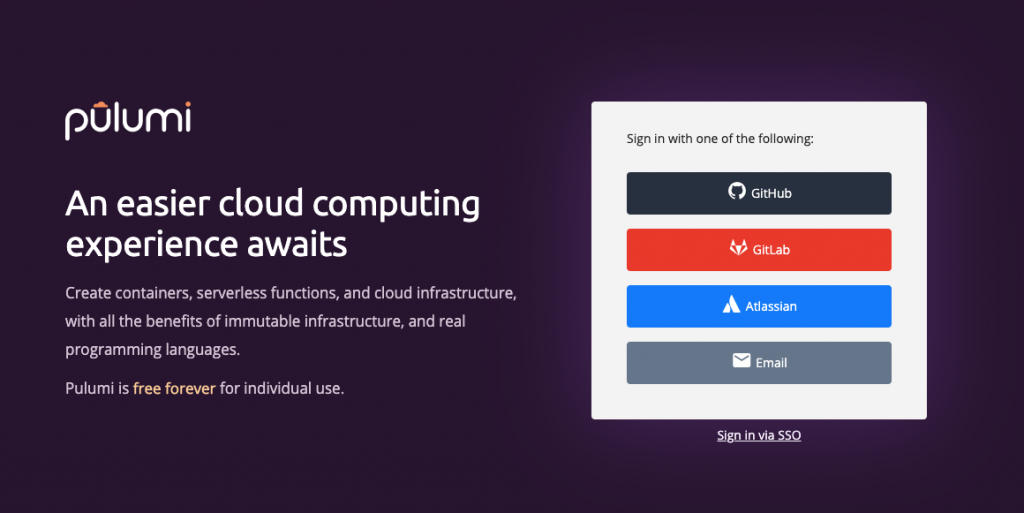
In order to use Pulumi in your command line, you will need to sign up into the Pulumi console, so that your stack’s state can be persisted. Don’t worry, as it’s free for personal use, and you can use either your GitLab, GitHub or Atlassian accounts as well as your email address to sign up.
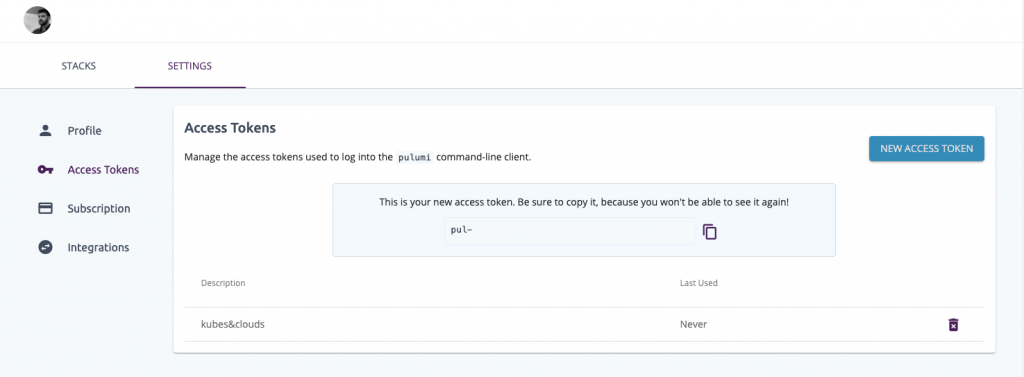
Once you are registered, it is time to generate an access token, as the CLI will ask for one in order to have access to your account and store the stack information.
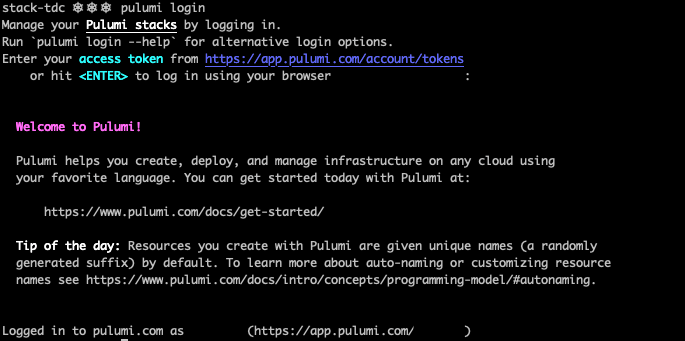
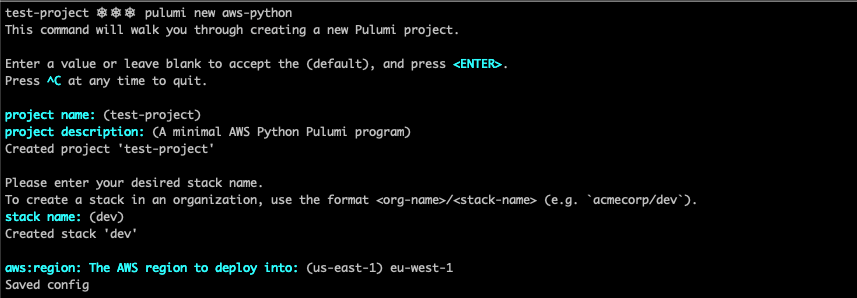
Finally, issue the following command and paste the access token you have just generated in the step before. If everything went well, you should see a similar output to the one shown in the image below.
pulumi login
Project structure🔖
If you were to create your first project on your own, you would have to create a directory and issue the following commands, specifying the cloud provider to use and the language to code with.
mkdir test-project
cd test-project
pulumi new <provider>-<language>
The Pulumi CLI would guide you through a simple setup process, where several parameters can be specified, such as the project name, its description, the stack name and the AWS region where it is to be deployed. However, keep in mind that for the examples in this article, pre-configured projects are used, thus, you don’t really have to follow this setup procedure, it’s just an indication in case you want to develop you own project from scratch.
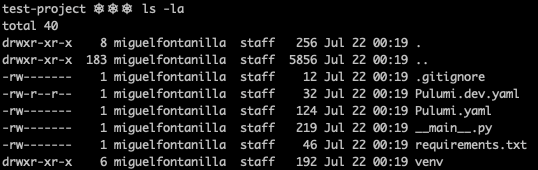
After setting up the project (a Python one in this case), the files present in the directory are the ones shown in the image below. Pulumi.yaml and Pulumi.dev.yaml are the project and stack configuration files respectively, whereas __main__.py is the Python program which defines the stack. The file requirements.txt contains the dependencies needed for the stack to work, and the venv directory is a Python virtual environment, which contains all the executables and libraries needed to use the Packages imported in the Python project.
The following snippet shows the contents of a Pulumi.yaml file. In order to make Pulumi work, at least name and runtime need to be defined. Under template.config, required values for the stack to work can be defined.
name: aws-py-eks
runtime: python
description: A minimal AWS Python EKS example cluster
template:
  config:
    aws:region:
      description: The AWS region to deploy into
      default: us-east-2
Deploying the Stack
To test Pulumi on different cloud providers, we will be using the Pulumi examples repository. Clone it to your machine using git to get started.
git clone https://github.com/pulumi/examples.git
cd examples
AWS☁️🔶
Prior to the deployment, you will need to configure your AWS credentials using the AWS CLI (you can get the AWS CLI here). In order to do so, you will need an AWS secret key and access key pair. If you don’t have one yet, you can create a new one in the AWS IAM console. Check this documentation as a guide.
aws configure
Keep in mind that the user which uses those credentials should have permissions to create the infrastructure specified in the code. For this example you can use the AdministratorAccess managed policy. Store well your credentials, and once this user is no longer needed, remove it, to avoid unnecessary risks.

For AWS we will be using the EKS python example. This example contains three main files: __main__.py, iam.py and vpc.py, which define respectively the EKS cluster, its associated IAM roles and policies and the VPC and networking resources needed to launch the instances on. The snippet below shows the contents of __main__.py , which defines a two-worker EKS cluster. Take your time to give a read to the different files which make up the entire example, so that you can have a general idea of the entire stack.
import iam
import vpc
import pulumi
from pulumi_aws import eks

## EKS Cluster

eks_cluster = eks.Cluster(
    'eks-cluster',
    role_arn=iam.eks_role.arn,
    tags= {'Name':'pulumi-eks-cluster'},
    vpc_config = {
        'publicAccessCidrs': ['0.0.0.0/0'],
        'security_group_ids': [vpc.eks_security_group.id],
        'subnet_ids': vpc.subnet_ids,
    }
)

eks_node_group = eks.NodeGroup(
    'eks-node-group',
    cluster_name=eks_cluster.name,
    node_group_name='pulumi-eks-nodegroup',
    node_role_arn=iam.ec2_role.arn,
    subnet_ids=vpc.subnet_ids,
    tags={
        'Name' : 'pulumi-cluster-nodeGroup'
    },
    scaling_config = {
        'desired_size': 2,
        'max_size': 2,
        'min_size': 1,
  },
)

pulumi.export('cluster-name', eks_cluster.name)
You will find the files for this example within the aws-py-eks directory.
cd aws-py-eks/
Create the virtual environment and activate it. After doing so, install the packages specified in requirements.txt.
virtualenv -p python3 venv
source venv/bin/activate
pip3 install -r requirements.txt
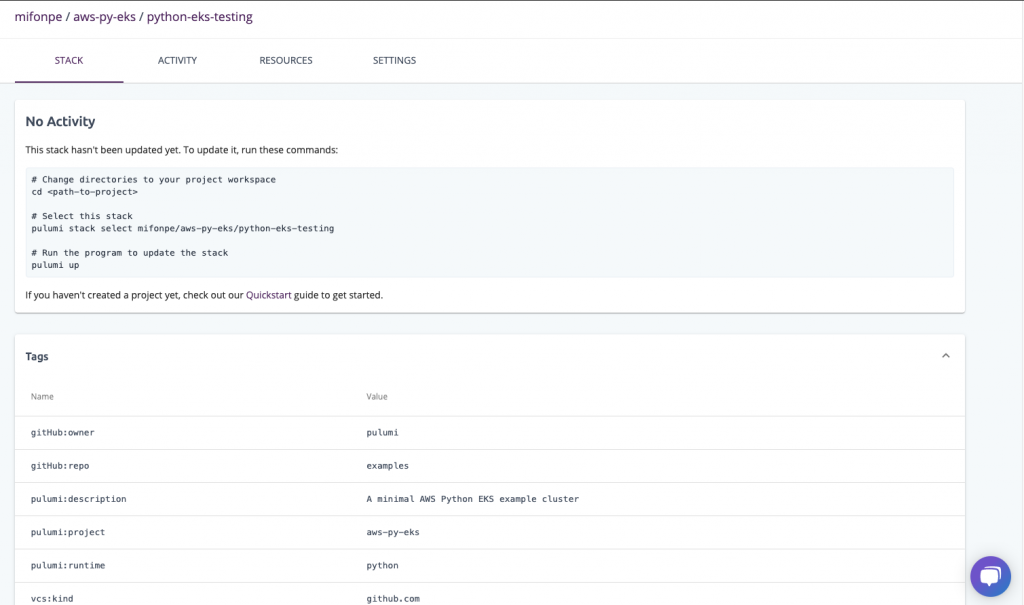
Once the python stuff is ready, initialize the stack. By accessing your Pulumi account after the initialization process you can check your new stack.
pulumi stack init python-eks-testing
Set the AWS region where the stack is to be deployed.
pulumi config set aws:region <aws-region>
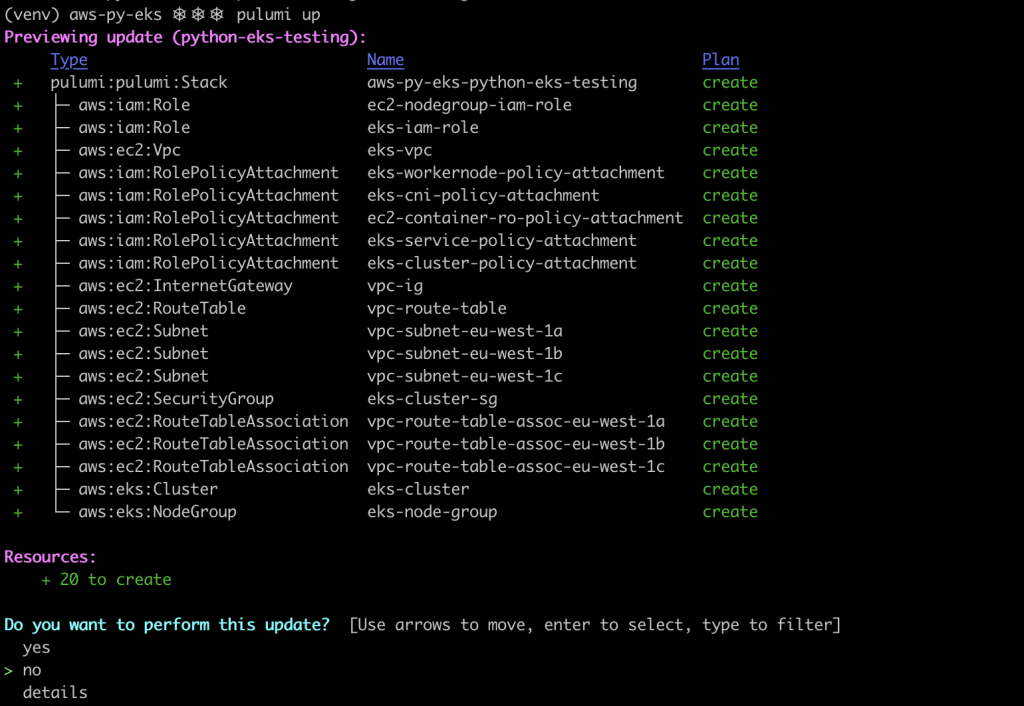
Issue the following command so that pulumi generates the deployment plan. If everything looks good to you, select yes and wait for the stack to be deployed⌛.
pulumi up
Update your local kubeconfig so that you can access the new cluster.
aws eks --region <aws-region> update-kubeconfig --name $(pulumi stack output cluster-name)
And voilà, the cluster was created successfully!

Once you’re done playing with the cluster, destroy the infrastructure and the stack. Check wether the resources to be destroyed match the previously created ones. By issuing deactivate, your Python virtual environment will be deactivated.
pulumi destroy
pulumi stack rm python-eks-testing
deactivate
GCP☁️ 🌈
Similar to what was done in the example before, GCP credentials need to be configured so that they can be used by Pulumi. You can use gcloud CLI to set the credentials up. By issuing the following commands, you can set your credentials using a web interface and authenticate using the gcloud SDK.
gcloud auth login
gcloud config set project <project-name>
gcloud auth application-default login
The snippet below shows the contents of __main__.py which can be found in the examples repository within this path. This python file creates a GKE (GCP’s managed Kubernetes) cluster and deploys an nginx canary deployment. To do so, it generates a Kubeconfig (k8s_config) which allows Pulumi to deploy resources into the cluster.
from pulumi import Config, export, get_project, get_stack, Output, ResourceOptions
from pulumi_gcp.config import project, zone
from pulumi_gcp.container import Cluster, get_engine_versions
from pulumi_kubernetes import Provider
from pulumi_kubernetes.apps.v1 import Deployment
from pulumi_kubernetes.core.v1 import Service
from pulumi_random import RandomPassword

config = Config(None)

NODE_COUNT = config.get('node_count') or 3
NODE_MACHINE_TYPE = config.get('node_machine_type') or 'n1-standard-1'
USERNAME = config.get('username') or 'admin'
PASSWORD = config.get_secret('password') or RandomPassword("password", length=20, special=True).result
MASTER_VERSION = config.get('master_version')

k8s_cluster = Cluster('gke-cluster',
    initial_node_count=NODE_COUNT,
    node_version=MASTER_VERSION,
    min_master_version=MASTER_VERSION,
    master_auth={ 'username': USERNAME, 'password': PASSWORD },
    node_config={
        'machine_type': NODE_MACHINE_TYPE,
        'oauth_scopes': [
            'https://www.googleapis.com/auth/compute',
            'https://www.googleapis.com/auth/devstorage.read_only',
            'https://www.googleapis.com/auth/logging.write',
            'https://www.googleapis.com/auth/monitoring'
        ],
    },
)

k8s_info = Output.all(k8s_cluster.name, k8s_cluster.endpoint, k8s_cluster.master_auth)
k8s_config = k8s_info.apply(
    lambda info: """apiVersion: v1
clusters:
- cluster:
    certificate-authority-data: {0}
    server: https://{1}
  name: {2}
contexts:
- context:
    cluster: {2}
    user: {2}
  name: {2}
current-context: {2}
kind: Config
preferences:
users:
- name: {2}
  user:
    auth-provider:
      config:
        cmd-args: config config-helper --format=json
        cmd-path: gcloud
        expiry-key: ''
        token-key: ''
      name: gcp
""".format(info[2]['clusterCaCertificate'], info[1], '{0}_{1}_{2}'.format(project, zone, info[0])))

k8s_provider = Provider('gke_k8s', kubeconfig=k8s_config)

labels = { 'app': 'canary-{0}-{1}'.format(get_project(), get_stack()) }
canary = Deployment('canary',
    spec={
        'selector': { 'matchLabels': labels },
        'replicas': 1,
        'template': {
            'metadata': { 'labels': labels },
            'spec': { 'containers': [{ 'name': 'nginx', 'image': 'nginx' }] },
        },
    }, __opts__=ResourceOptions(provider=k8s_provider)
)

ingress = Service('ingress',
    spec={
        'type': 'LoadBalancer',
        'selector': labels,
        'ports': [{'port': 80}],
    }, __opts__=ResourceOptions(provider=k8s_provider)
)

export('kubeconfig', k8s_config)
export('ingress_ip', Output.all(ingress.status['load_balancer']['ingress'][0]['ip']))
Prepare the Python environment and initialize the stack as you did in the example before.
cd ../gcp-py-gke
virtualenv -p python3 venv
source venv/bin/activate
pip3 install -r requirements.txt
pulumi stack init python-gke-testing
This example uses some variables that need to be set before generating the deployment plan. In order to do so, pulumi config set command can be used. Keep in mind that your password needs to be at least 16 characters long!
pulumi config set gcp:project <gcp-project>
pulumi config set gcp:zone <gcp-zone>
pulumi config set password --secret <cluster-password>
pulumi config set master_version <master-version>
Once the required variables are set, you can generate the deployment plan and accept it.
pulumi up
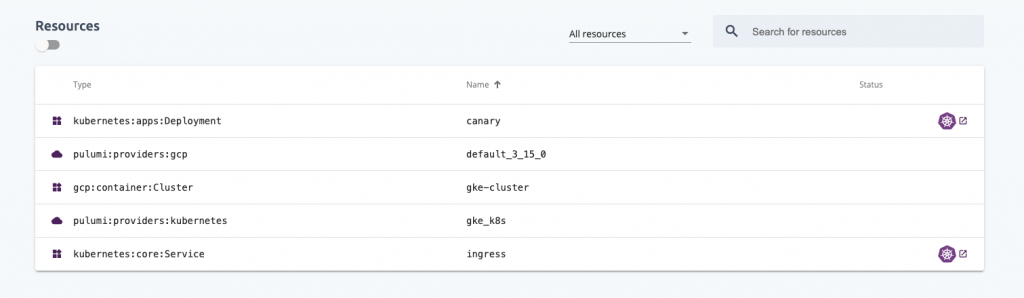
If you login to your Pulumi account after creating the infrastructure, you will be able to check the different resources that were created, as well as the outputs generated and variables defined for the stack.
The kubeconfig created in the code is accesible as a Pulumi output. However it is stored as a ciphered output in the stack, so you will need the --show-secrets flag to decode it🔐.
pulumi stack output kubeconfig --show-secrets > kubeconfig.yaml
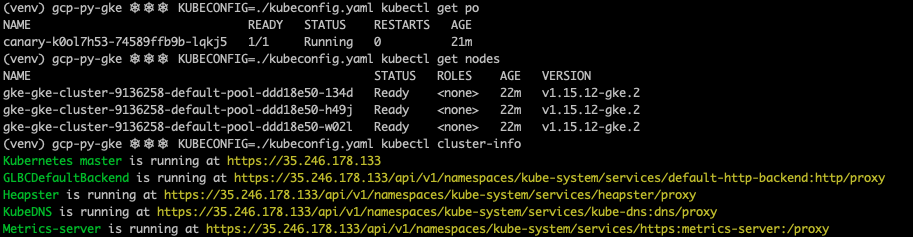
Using this Kubeconfig, you will be able to access the cluster using kubectl, and check that the canary deployment is present.
As before, once you finish testing the cluster, destroy the resources, the Pulumi stack and deactivate the Python virtual environment.
pulumi destroy
pulumi stack rm python-gke-testing
deactivate
Azure☁️🔷
The examples repository provides a similar example to the ones shown before with the Azure managed Kubernetes service (AKS). However, I’m sure you have gotten the general idea by now 😉 , so If you’re really interested in testing it, feel free to follow the instructions in the repository and create an AKS cluster.
Pulumi and Kubernetes☸️
Last but not least, Pulumi can directly interact with Kubernetes clusters
(managed as well as self-hosted ones) in order to deploy applications and resources. The code below creates a simple nginx deployment in Kubernetes using Python.
import pulumi
from pulumi_kubernetes.apps.v1 import Deployment

config = pulumi.Config()
nginxLabels = { "app": "nginx" }
nginxDeployment = Deployment(
    "nginx-deployment",
    spec={
        "selector": { "matchLabels": nginxLabels },
        "replicas": 2 if config.get_int("replicas") is None else config.get_int("replicas"),
        "template": {
            "metadata": { "labels": nginxLabels },
            "spec": {
                "containers": [{
                    "name": "nginx",
                    "image": "nginx:1.7.9",
                    "ports": [{ "containerPort": 80 }],
                }],
            },
        },
    })

pulumi.export("nginx", nginxDeployment.metadata["name"])
To interact with the cluster you will only need to set your KUBECONFIG variable to the path of the Kubeconfig of the cluster to use. Once you have set it, execute the following commands to get the stack deployed.
cd ../kubernetes-py-nginx
virtualenv -p python3 venv
source venv/bin/activate
pip3 install -r requirements.txt
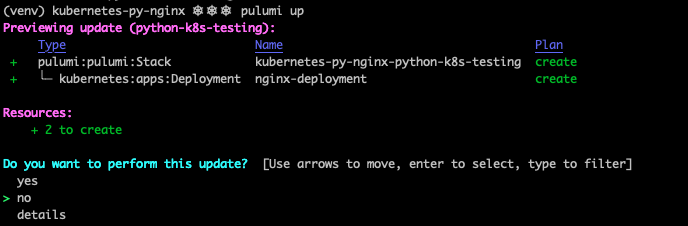
pulumi stack init python-k8s-testing
pulumi up
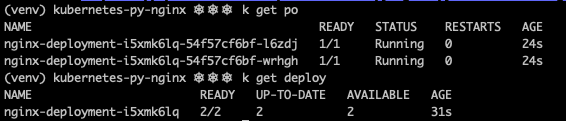
If you inspect the pods and deployments in your cluster, you will see that the resources were created as expected by Pulumi.
Clean everything up once you’re done!
pulumi destroy
pulumi stack rm python-k8s-testing
deactivate
Keep learning👩💻👨💻
If you liked Pulumi, take some time to go through the examples repository, as you will find quite a lot of interesting use cases, using different programming languages and cloud providers.
Some of the most interesting examples are:
- Using Helm with Typescript
- Serverless URL shortener in Azure with Typescript
- GGP Cloud functions with Python and Go
- Deploying a Jenkins CI server in k8s with Python
- Deploying a Slackbot in GCP with Typescript
Become ‘IaC Polyglot’, trust me, it is worth it😎!