Helm is definitely one the most used tools in the Kubernetes world. It comes in pretty handy as it is a deployment tool, a package manager and a templating tool which can help customizing the behavior of application releases based on the values used. Plus, it offers ideal features for its integration in modern CI/CD environments, making it a must-to-have ‘swiss army knife’ in your DevOps toolset.
Helm works with charts, which act as independent software packages, but for complex environments in which several charts have to be deployed, there’s no easy way to handle all the releases at once. In my own experience, Helm plugins can be developed to orchestrate multiple releases and multiple values across environments. However, this approach ends up generating an important overhead, as the plugin or plugins used need to be maintained and it prevents you from using ‘standard’ Helm in some out-of-the-box integrations, such as CD and GitOps tools. But don’t worry, there’s a tool that can help you overcome these issues: Helmfile.
Helmfile is a CLI tool developed by Robert Boll that provides a declarative way to orchestrate multiple Helm releases as code. It introduces great flexibility and modularity for chart and values management, and a ‘Terraform-like’ way of applying changes in the cluster. Plus, it also supports kustomize in case you don’t want to follow the ‘Helm path’🌚.
As in previous articles, a specific repo with examples has been developed, you can find it here.
Installing Helmfile ⬇️
Helmfile relies on Helm to deploy releases, so first of all, you need to install Helm in your local machine. The following commands fetch Helm 3 installer script (don’t even think about using Helm 2 😂).
curl -fsSL -o get_helm.sh https://raw.githubusercontent.com/helm/helm/master/scripts/get-helm-3
chmod 700 get_helm.sh
./get_helm.sh
If you prefer to install the binary manually, you can find it in the Helm’s releases page.
Next, install Helmfile in your local machine. You can do it by getting its binary in Helmfile’s releases page. Execute the following commands adding your specific OS/platform to the URL.
curl -fsSL -o helmfile https://github.com/roboll/helmfile/releases/download/v0.135.0/helmfile_<your-platform>
chmod 700 helmfile
mv helmfile  /usr/local/bin
Finally you will need to install Helm’s diff plugin, as it is needed by Helmfile in order to show the differences between the releases present in the cluster and the changes to be applied.
helm plugin install https://github.com/databus23/helm-diff
Repository structure 📂
Once all the binaries and plugins are in place, it’s time to go through the structure used by Helmfile to organize the different releases as code. To get an example Helmfile, clone the example repository.
git clone https://github.com/mifonpe/helmfile-example
cd helmfile-example
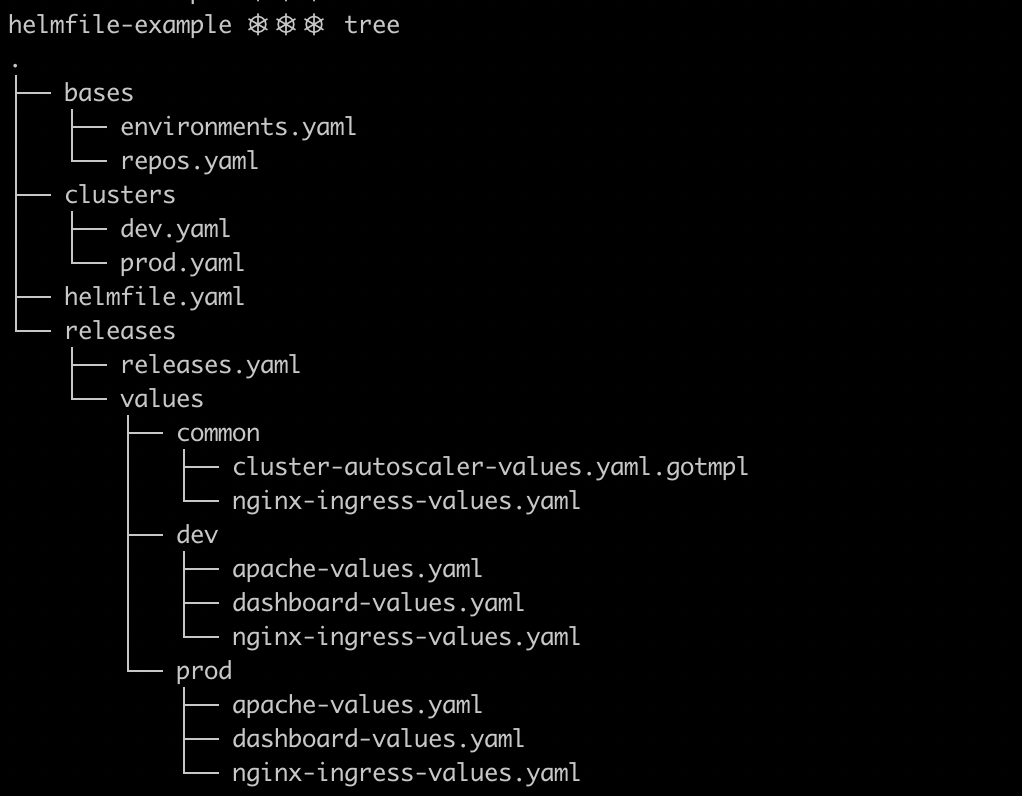
Keep in mind that Helmfile structure is highly customizable, and files can be referenced from other files, approach known as layering, which offers endless possibilities to organize the code. The image below, shows the content of the example Helmfile developed for this article, which is just a convenient and particular way of organizing Helmfile and its nested files.
- In the root level, you can find helmfile.yaml, which is the default name for the configuration file. It works as an entrypoint and references the rest of files.
- The directory bases contain the Helm repositories to use, as well as configuration and values for the environments.
- The directory releases contains releases.yaml, which specifies the Helm releases to install, and some release-specific metadata.
- Under releases/values you can find the different values files to use. Helmfile merges these values with the default values present in the charts.
helmfile.yaml defines the bases, the nested helmfiles and defaults. The base files are merged together and with the helmfile.yaml file before processing the rest of files. The following snippet shows its contents.
bases:
  - "bases/repos.yaml"
  - "bases/environments.yaml"

helmfiles:
  - "releases/releases.yaml"

helmDefaults:
  atomic: true
  createNamespace: true
  cleanupOnFail: true
  verify: true
  timeout: 300
  wait: true
Under the helmfiles directive you can specify the file or files in which the Helm releases are defined. To keep this example as simple as possible, all the releases will be placed within the same file (releases/releases.yaml). The helmDefaults directive provides a lot of different options to customize the behavior of the underlying Helm CLI.
repos.yaml file is just a collection of Helm repositories that Helmfile can use in order to fetch the releases specified. As a part of the ‘base’ files, it is merged with helmfile.yaml. You can see the contents of this file right below.
---
repositories:
- name: stable
  url: https://charts.helm.sh/stable
- name: ingress-nginx
  url: https://kubernetes.github.io/ingress-nginx
- name: bitnami
  url: https://charts.bitnami.com/bitnami
- name: kubernetes-dashboard
  url: https://kubernetes.github.io/dashboard/
The next snippet is extracted from releases.yaml. Under the releases directive, the different Helm releases to deploy into the cluster are specified alongside some parameters to customize them. The path to the values file or files to use, that are combined with the chart’s default values is also specified here. Notice how the environment name can be used as value to be substituted, and that Helmfile supports conditional releases depending on the values specified using go templating.
In this case, the autoscaler will only be deployed to the production environment, taking into account the values defined in /bases/environments.yaml.
---
bases:
  - "../bases/environments.yaml"
  - "../bases/repos.yaml"
---

releases:
- name: "cluster-autoscaler-"
  namespace: "autoscaler"
  chart: "stable/cluster-autoscaler"
  labels:
    chart: "cluster-autoscaler"
    repo: "stable"
    namespace: "kube-system"
  version: 8.0.0
  values:
    - "./values/cluster-autoscaler.values.yaml"


- name: "nginx-ingress-"
  namespace: "nginx-ingress"
  createNamespace: true
  chart: "ingress-nginx/ingress-nginx"
  labels:
    chart: "ingress-nginx"
    repo: "ingress-nginx"
    component: "ingress"
    namespace: "kube-ingress"
  version: 3.11.0
  values:
    - "./values/common/nginx-ingress-values.yaml"
    - "./values//nginx-ingress-values.yaml"
NOTE: It’s important to mention here, that Helmfile treats the values files differently depending on their extension. If you need to render template expressions within the values files, add the .gotmpl extension, since otherwise, the files will be evaluated as they are. The code below shows the contents of cluster-autoscaler-values.yaml.gotmpl, the only values file in this example that actually uses template expressions. In this case it is used to define the cluster name based on the environment.
rbac:
  create: true
cloudProvider: aws
awsRegion: eu-west-1
replicaCount: 1
extraArgs:
  v: 4
  balance-similar-node-groups: true
autoDiscovery:
  clusterName: "-cluster"
  enabled: true
Deploying charts ⚙️
In order to test Helmfile, we will deploy releases to two different environments: production and development. The example Helmfile, consists of four Helm releases:
- Nginx Ingress Controller
- Kubernetes Dashboard
- Cluster Autoscaler
- Apache server
As commented before, Autoscaler release is intended to be deployed only in production by using Helmfile advanced configuration. Plus, Kubernetes Dashboard and Apache releases use different values depending on the environment (ingress name, number of replicas, etc).
The environments will be supported by EKS clusters deployed using eksctl. If you missed the previous article on eksctl, and you want to know more about this tool, feel free to give it a look.
However, you can also test this example locally with minikube or docker desktop (or in your own cluster), but keep in mind that you won’t be able to emulate two separate clusters in that case.
In order to get started, fetch eksctl binary and place it under your PATH.
curl --silent --location "https://github.com/weaveworks/eksctl/releases/latest/download/eksctl_$(uname -s)_amd64.tar.gz" | tar xz -C /tmp
sudo mv /tmp/eksctl /usr/local/bin
Prior to the deployment, you will need to configure your AWS credentials using the AWS CLI. In order to do so, you will need an AWS secret key and access key pair. If you don’t have one yet, you can create a new one in the AWS IAM console. Check this documentation as a guide.
aws configure
Keep in mind that the user which uses those credentials should have permissions to create the infrastructure specified in the code. For this example you can use the AdministratorAccess managed policy. Store well your credentials, and once this user is no longer needed, remove it, to avoid unnecessary risks.

Development environment 🏗️
Once eksctl is ready, execute the following commands to create the development cluster in your AWS account, and wait for eksctl to finish bootstrapping it. Be patient, as it may take a while⏳.
cd clusters
eksctl create cluster -f dev.yaml
If everything works as expected, you will have a single node cluster by now. Eksctl points your local kubeconfig and context to the newly created cluster, so there’s no need for further configuration.

Once the cluster is in place, let’s start deploying the releases. In first place execute the following command so that the repositories are added and updated (equivalent to helm repo add && helm repo update).
cd ..
helmfile --environment  dev repos
Helmfile can also be used to lint the templates that make up every release. To do so, execute the following command. By using the --skip-deps flag Helmfile skips the repo add and update steps as well as the building of the chart dependencies (helm dependency build).
helmfile --environment dev lint --skip-deps
Issuing the next command will install the adequate set of releases in the development environment. The --suppress-secrets flag tells Helmfile not to show the secret values as an output. This is specially useful for CI/CD environments, in which runner logs are usually explicit.
helmfile --environment dev apply --suppress-secrets --skip-deps
As commented before, Helmfile follows a ‘Terraform-like’ way of showing and applying changes. In this case, all the resources will be shown in green, as they are new resources to be added. Notice how the secrets definitions are hidden.

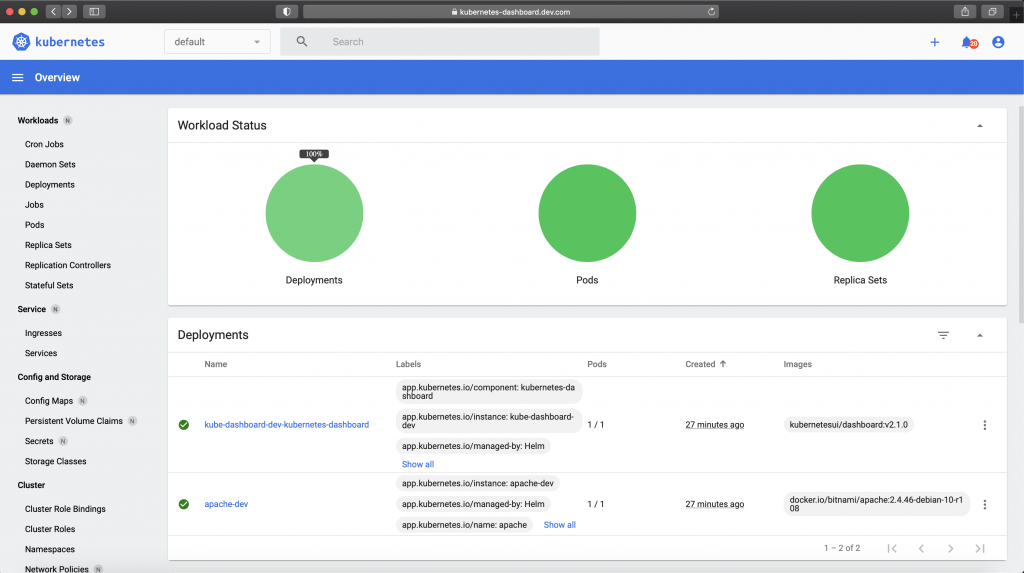
By now you should have three new releases deployed in your cluster, you can check them by issuing the following Helm command.
helm ls --all-namespaces

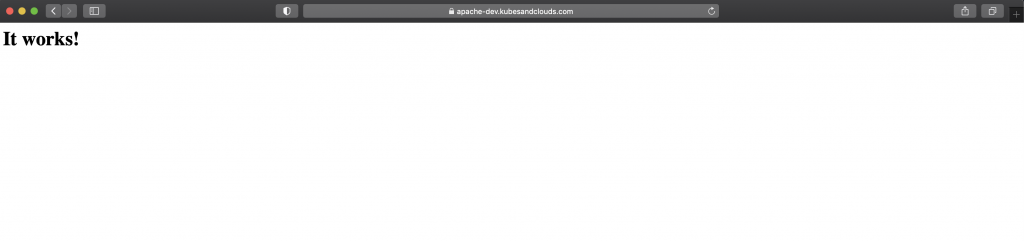
Since both apache and Kubernetes dashboard releases are exposed using an ingress, you can reach both applications with a web browser.
NOTE: You may have noticed that both ingresses were accessible without further DNS configuration. How was it possible? Well it’s just an old trick which consists in setting the ingress load balancer IP alongside the ingress subdomains in the /etc/hosts file. If you want to do the same, you can obtain the load balancer IP by executing the following command.
kubectl get ingress | grep dashboard | awk '{print $3}'| xargs -I {} nslookup {} | grep Address | tail -1 | cut -f 2 -d ":"
Once you get the IP, append the follow entries to the /etc/hosts file.
sudo -- sh -c 'echo "<LB-IP> apache-dev.kubesandclouds.com" >> /etc/hosts'
sudo -- sh -c 'echo "<LB-IP> kubernetes-dashboard.dev.com" >> /etc/hosts'
Helmfile provides a sync command that allows to synchronize the contents of the state files (repos, releases and chart dependencies), and it is advisable to execute it periodically to ensure that the releases deployed are up to date. The main difference between helmfile apply and helmfile sync is that the former just apply changes if any difference is detected, while the second syncs all the resources.
helmfile --environment dev sync --skip-deps
Now, let’s change some values in the development environment. Increase the number of replicas for the apache deployment for example and execute the following command. It will show what fields of the Kubernetes objects will be modified on the releases existing in your cluster. This command is pretty convenient for CI/CD environments in which manual approval is needed based on a deployment plan. In those cases, you can generate the deployment plan with helmfile diff and once approved, issue the changes with helmfile apply.
helmfile --environment dev diff --suppress-secrets --skip-deps
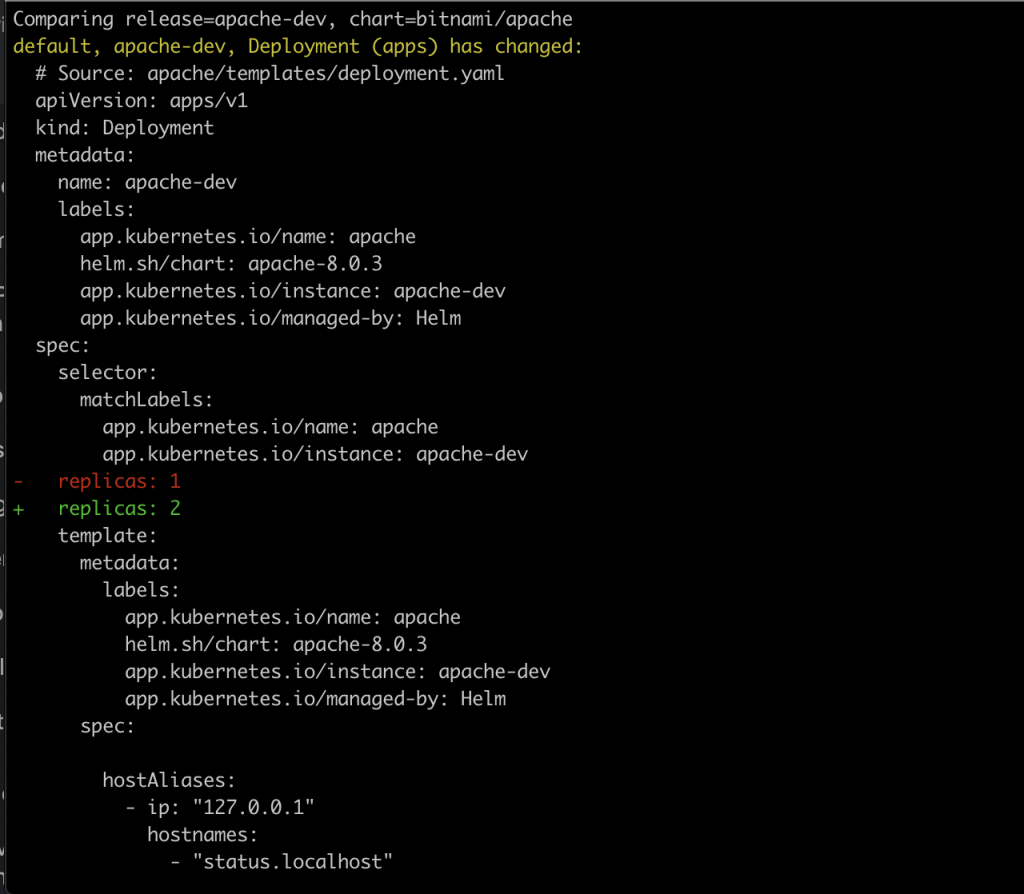
Helmfile’s diff command relies on Helm diff plugin, that’s why we had to install it at the very beginning
Production environment 🏭
Now let’s deploy the production cluster following the same approach used for the development environment.
cd clusters
eksctl create cluster -f prod.yaml
cd ..
helmfile --environment  prod repos
helmfile --environment prod apply --suppress-secrets --skip-deps
If everything works out as expected, you should end up with something like what is shown in the image below. In this case, a new release has been added, cluster autoscaler, as the conditional values only allowed it to be deployed in the production environment.

This cluster autoscaler is fully functional, you can try it out by scaling the apache deployment with the following command.
kubectl scale deploy apache-prod --replicas=20
If you give the cluster autoscaler a pair of minutes, you should see new nodes kicking in to handle the increase in requests generated by the new replicas.

Cleaning up 🧹
Once you’re done playing around with the EKS clusters and Helmfile, you can just destroy them using eksctl💥.
cd clusters/
eksctl delete cluster -f dev.yaml
eksctl delete cluster -f prod.yaml
In case you’re running your own cluster, you can just clean all deployed releases by issuing the following commands.
helmfile --environment dev destroy
helmfile --environment prod destroy
Keep learning 👩💻👨💻
If you liked Helmfile, take some time to go through its Github repo, as you will better understand all the advanced features and options to customize releases and Helm behavior, as well as how to structure your Helmfile repository.
Remember that the example presented in this article is just one way of organizing Helmfiles, you can give it a try and organize them as it better suit your needs: placing all releases and configuration in just one file, one file per release, etc. If you want to know more about how to organize your Helmfiles, you can give a look to the Helmfile best practices guide.