Setting up a Kubernetes cluster from scratch can be challenging, specially if you don’t use managed Kubernetes services and you need to guarantee High Availability. Kops (Kubernetes Operations) is an open source tool which helps to set up, upgrade and manage ‘non-managed’ Kubernetes Clusters on top of public cloud providers. In this post, you will learn how to deploy an HA Kubernetes cluster on top of AWS.

Kops by Pattern Match
Setting Kops up
The first step here will be getting Kops CLI. Assuming you’re using a Linux distribution, you can use the commands below. Otherwise, check this link.
curl -LO https://github.com/kubernetes/kops/releases/download/$(curl -s https://api.github.com/repos/kubernetes/kops/releases/latest | grep tag_name | cut -d '"' -f 4)/kops-linux-amd64
chmod +x kops-linux-amd64
sudo mv kops-linux-amd64 /usr/local/bin/kops
Besides, you will need to interact with AWS API, so you are going to need the AWS CLI. The set of commands below shows how to install it on Linux distributions. For any other OS, follow these instructions.
curl "https://awscli.amazonaws.com/awscli-exe-linux-x86_64.zip" -o "awscliv2.zip"
unzip awscliv2.zip
sudo ./aws/install
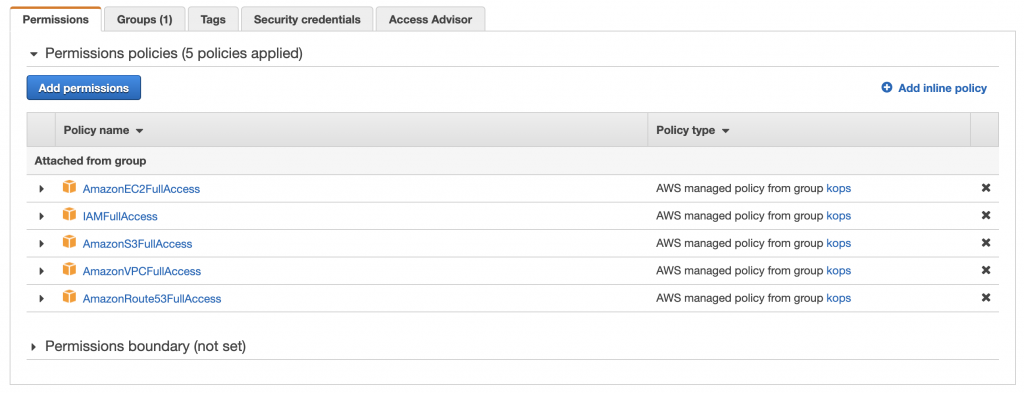
Kops is going to need a programmatic AWS IAM user so that it can deploy the necessary infrastructure for the Kubernetes cluster. This user must be granted full access to IAM, EC2, S3, VPC and Route53 services. To do so, you can directly attach the AmazonEC2FullAccess, AmazonRoute53FullAccess AmazonS3FullAccess, IAMFullAccess and AmazonVPCFullAccess managed policies to the user.
When creating the user, select the programmatic access option, since by doing this, AWS will generate a pair of Access Keys and Secret Keys for the CLI to access AWS API. Store well the secret key, as it is the only time it will be displayed. Once you have both keys, set them as the default keys for the CLI by issuing the following command. With this command, you can also set the default AWS region.
aws configure

In order to store the state of the clusters, Kops will need an S3 bucket. You can use your new credentials to create the bucket using the AWS CLI. Furthermore, enabling bucket versioning is advisable, as it can help you recovering the cluster state in case of a failure.
aws s3api create-bucket --bucket <your-s3-bucket> --region eu-west-1
aws s3api put-bucket-versioning --bucket <your-s3-bucket>  --versioning-configuration Status=Enabled
Creating the cluster
The script below helps with the cluster creation, in order to better configure the cluster parameters and some additional options. You can select the Kubernetes version, the number of master and worker nodes, the type of instance, as well as the Availability Zones where the instances will be deployed to. The networking options and network CIDR range can be set here too. You can check the list of supported networking options here. Besides, you can choose whether you want to generate a terraform or cloudformation output.
Set the parameters according to your needs, and run the script. For this example, we will use a cluster name which ends with .k8s.local, as it is the simplest setup, without requiring an external DNS server to propagate the Kubernetes API IPs. If you need to use an external DNS service, check this documentation. By running the script, Kops will generate the cluster specification, but it will not deploy the cluster yet.
#!/bin/bash

# Kops Kubernetes HA deployment for aws
export CLOUD=aws
MASTER_NUMBER=3
MASTER_ZONES="eu-west-1a,eu-west-1b,eu-west-1c"
MASTER_SIZE="t2.medium"
WORKER_NUMBER=3
WORKER_ZONES="eu-west-1a,eu-west-1b,eu-west-1c"
WORKER_SIZE="t2.medium"
CNI_PLUGIN="calico"
CLUSTER_NAME="testlab.k8s.local" # if ends in .k8s.local --> gossip-based cluster
K8S_VERSION=1.17.0
NETWORK_CIDR="10.240.0.0/16"
NW_TOPOLOGY="private" # public: uses a gateway | private
STORAGE_BUCKET="<your-s3-bucket>"
BUCKET_REGION="eu-west-1"
EXTRA_ARGS=" --target=terraform "
# EXTRA_ARGS=" --target=cloudformation "

export AWS_ACCESS_KEY_ID=$(aws configure get aws_access_key_id)
export AWS_SECRET_ACCESS_KEY=$(aws configure get aws_secret_access_key)
export KOPS_STATE_STORE="s3://${STORAGE_BUCKET}"

# configure cluster
kops create cluster --node-count ${WORKER_NUMBER} --zones ${WORKER_ZONES} \
    --master-zones ${MASTER_ZONES} --node-size ${WORKER_SIZE} \
    --master-size ${MASTER_SIZE} --kubernetes-version=${K8S_VERSION} \
    --network-cidr=${NETWORK_CIDR} --cloud=${CLOUD} \
    --topology ${NW_TOPOLOGY} --networking ${CNI_PLUGIN}   ${CLUSTER_NAME} \
    ${EXTRA_ARGS} \
You can check the cluster specification by issuing the command below. Remember to set the state flag with the name of your state bucket. It can be also used to modify already created clusters.
kops edit cluster testlab.k8s.local --state s3://<your-s3-bucket>
The edit command will open a vi editor, where you can modify all the parameters according to your needs. If you go through the yaml specification you can see that the cluster specification matches all the parameters passed to the create command, and additional elements needed to support the cluster infrastructure, such as subnets, are added.
apiVersion: kops.k8s.io/v1alpha2
kind: Cluster
metadata:
  creationTimestamp: "2020-06-03T20:29:13Z"
  name: testlab.k8s.local
spec:
  api:
    loadBalancer:
      type: Public
  authorization:
    rbac: {}
  channel: stable
  cloudProvider: aws
  configBase: s3://<your-s3-bucket>/testlab.k8s.local
  etcdClusters:
  - cpuRequest: 200m
    etcdMembers:
    - instanceGroup: master-eu-west-1a
      name: a
    - instanceGroup: master-eu-west-1b
      name: b
    - instanceGroup: master-eu-west-1c
      name: c
    memoryRequest: 100Mi
    name: main
    version: 3.2.24
  - cpuRequest: 100m
    etcdMembers:
    - instanceGroup: master-eu-west-1a
      name: a
    - instanceGroup: master-eu-west-1b
      name: b
    - instanceGroup: master-eu-west-1c
      name: c
    memoryRequest: 100Mi
    name: events
    version: 3.2.24
  iam:
    allowContainerRegistry: true
    legacy: false
  kubelet:
    anonymousAuth: false
  kubernetesApiAccess:
  - 0.0.0.0/0
  kubernetesVersion: 1.17.0
  masterInternalName: api.internal.testlab.k8s.local
  masterPublicName: api.testlab.k8s.local
  networkCIDR: 10.240.0.0/16
  networking:
    calico:
      majorVersion: v3
  nonMasqueradeCIDR: 100.64.0.0/10
  sshAccess:
  - 0.0.0.0/0
  subnets:
  - cidr: 10.240.32.0/19
    name: eu-west-1a
    type: Private
    zone: eu-west-1a
  - cidr: 10.240.64.0/19
    name: eu-west-1b
    type: Private
    zone: eu-west-1b
  - cidr: 10.240.96.0/19
    name: eu-west-1c
    type: Private
    zone: eu-west-1c
  - cidr: 10.240.0.0/22
    name: utility-eu-west-1a
    type: Utility
    zone: eu-west-1a
  - cidr: 10.240.4.0/22
    name: utility-eu-west-1b
    type: Utility
    zone: eu-west-1b
  - cidr: 10.240.8.0/22
    name: utility-eu-west-1c
    type: Utility
    zone: eu-west-1c
  topology:
    dns:
      type: Public
    masters: private
    nodes: private
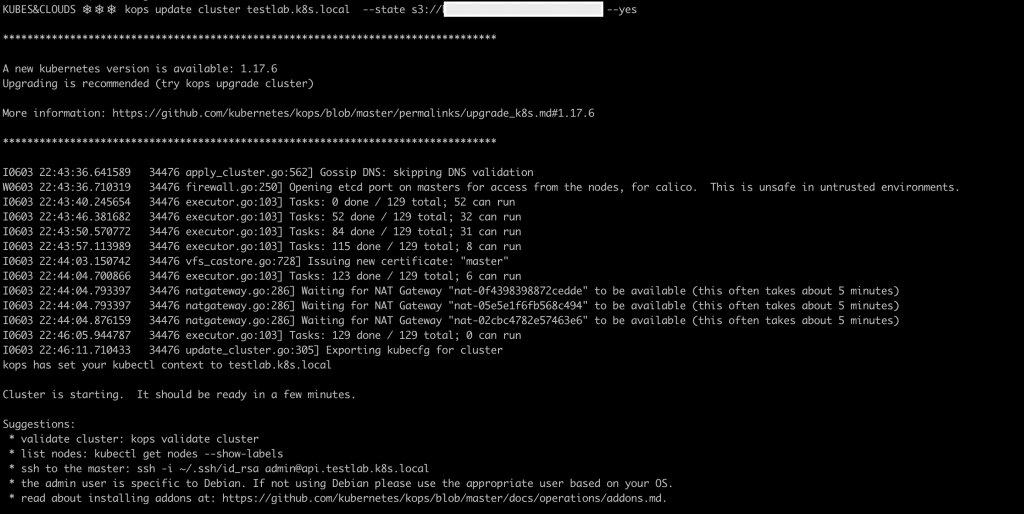
By issuing the following command the cluster specification will generate an actual cluster in the AWS account. Be patient as it takes a while. If the command is executed without the --yes flag, it will show all the resources that are about to be created, but the resources will be not created.
kops update cluster <your-cluster-name> --state s3://<your-s3-bucket> --yes
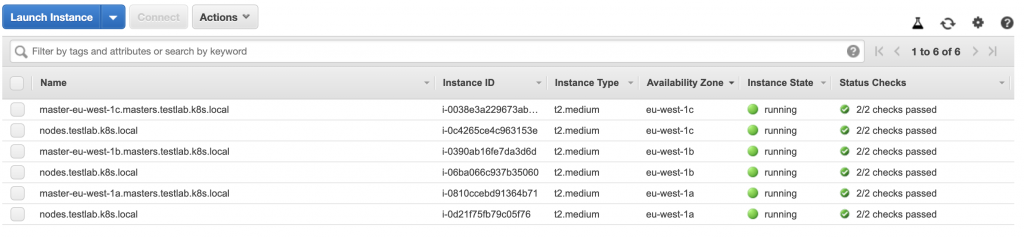
Once the creation process has finished, you can check the AWS EC2 dashboard to see your new instances, 3 masters and 3 workers in this case.
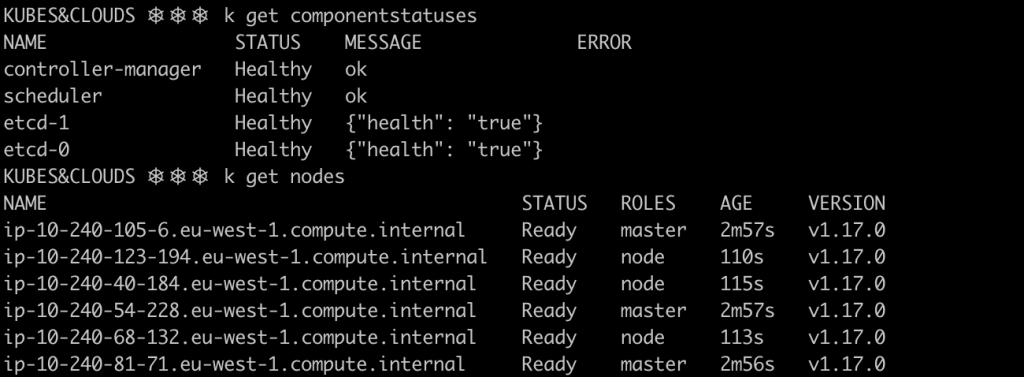
A pretty good way of checking if everything is up and running is executing the following commands. The first one prints out the status of all the control plane elements, whereas the second list the nodes and their statuses.
kubectl get componentstatuses
kubectl get nodes
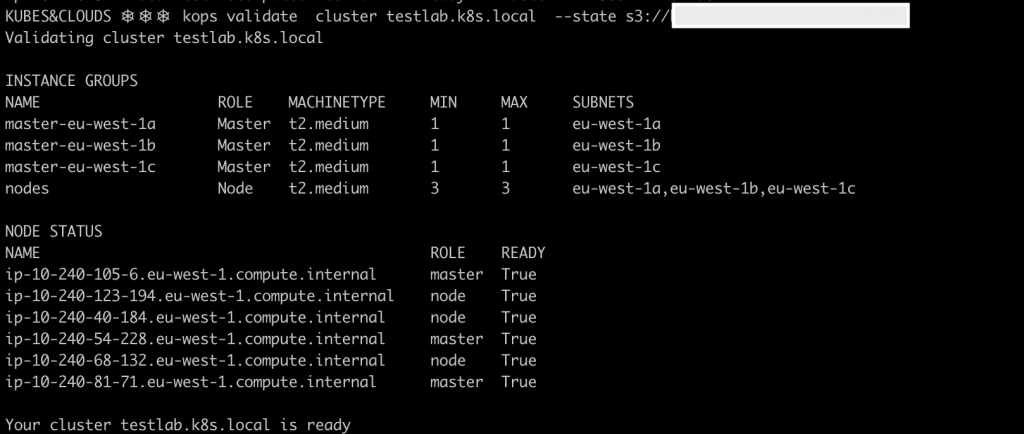
Besides, Kops offers a built-in cluster check that comes in very handy too.
kops validate cluster <your-cluster-name> --state s3://<your-s3-bucket>
Cleaning up
If you want to delete the cluster and all the associated resources that were created, just issue the following command. If you use it without the --yes flag it displays a detailed list of all the elements that will be destroyed, but it will not destroy them until you add the flag.
kops delete cluster testlab.k8s.local --state s3://<your-s3-bucket> --yes
More about Kops
Kops is a widely used tool for managing Kubernetes clusters in production environments, and it offers quite a lot of flexibility and advanced features that help customizing each cluster to the requirements it should meet. It helps with the creation, update and upgrade of the clusters in a simple way. However, keep in mind that Kops does not support all features that Kubernetes offers when creating a cluster ‘by hand’, for example, not all network plugins are currently supported by Kops, or at least not in a stable way.
If you want to know more about Kops, read the docs.