Dealing with multiple terraform remote states can become a rather complex task. Besides, querying resources with terraform CLI isn’t very visual 😅. In this post we will present Terraboard, an open source tool developed by Camptocamp that solves these issues.

Terraboard provides a web interface which also adds a diff tool to compare different resource versions. It currently supports terraform states in both AWS S3 and Terraform Cloud backends.
Testing it locally 💻
Terraboard is distributed as a CLI written in Go, alongside an AngularJS web UI, and it requires a Postgres database in order to work. There are several ways to test it and deploy it, as you can check in Terraboard’s GitHub Repo. For this example, we will use Terraboard’s Docker image. Besides, a simple script has been developed to make it easier to run Terraboard locally.
In order to execute this script, Docker must be installed in your local machine. You can get the appropriate version for your OS here. Execute the following commands to download it and so that you can invoke the script from your command line.
curl -fsSL -o terraboard https://raw.githubusercontent.com/mifonpe/terraboard/main/terraboard
chmod 700 terraboard
mv terraboard /usr/local/bin
For this example, AWS S3 will be used as the backend, so you will need a pair of access key and secret access key. If you don’t have one yet, you can create a new one in the AWS IAM console. Check this documentation as a guide.
Keep in mind that the IAM user associated to the keys should have the following set of permissions on the backend s3 bucket:
- s3:GetObject
- s3:ListBucket
- s3:ListBucketVersions
- s3:GetObjectVersion
If you want to limit the scope of this programmatic user so that it only has access to the state bucket, you can use the following IAM policy adding the name of the bucket which holds the terraform states.
{
  "Version": "2012-10-17",
  "Statement": [
    {
      "Effect": "Allow",
      "Action": ["s3:ListBucket" ],
      "Resource": ["arn:aws:s3:::your-bucket-name"]
    },
    {
      "Effect": "Allow",
      "Action": [
         "s3:ListBucket",
         "s3:ListBucketVersions",
         "s3:GetObject",
         "s3:GetObjectVersion"
      ],
      "Resource": ["arn:aws:s3:::your-bucket-name/*"]
    }
  ]
}
Keep in mind that the terraform bucket needs to be versioned so that Terraboard can compare the different versions of the states.
Once the keys and permissions are set, export them as environment variables as well as the AWS region and bucket name.
export AWS_ACCESS_KEY_ID=<your-key>
export AWS_SECRET_ACCESS_KEY=<your-secret-key>
export AWS_REGION=<your-region>
export TFSTATE_BUCKET=<your-bucket>
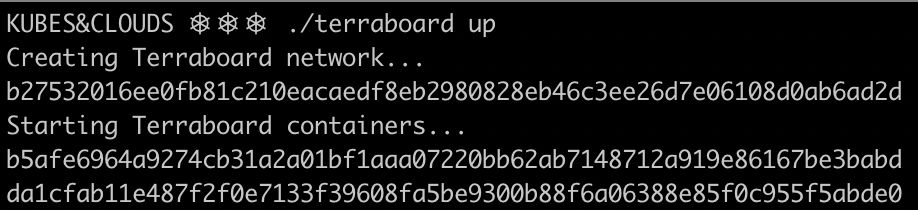
Start Terraboard and wait for the script to complete.
terraboard up
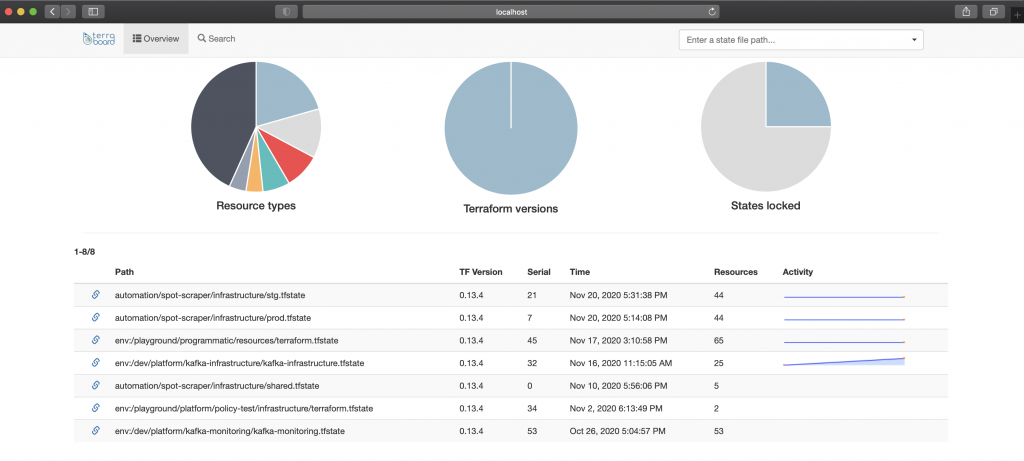
If everything went well and you hit localhost on port 8080 you will be able to access Terraboard’s UI. In this case it’s showing the different terraform state files present in the bucket. Feel free to play around with the interface, and give a look to the search utility, which allows filtering resources by different criteria such as Terraform version or resource type.
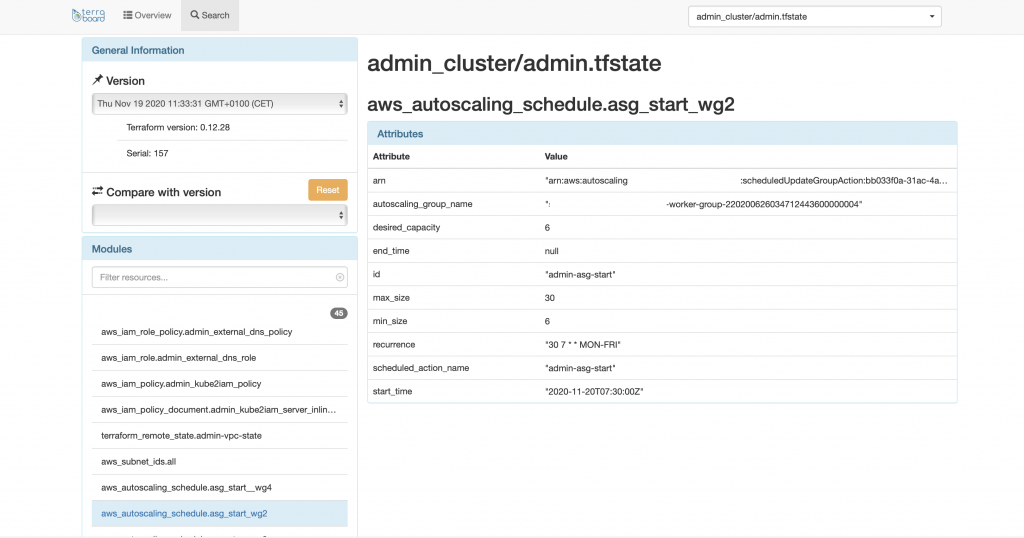
If you examine a specific state, you can go through its resources and modules, getting detailed information and parameters.
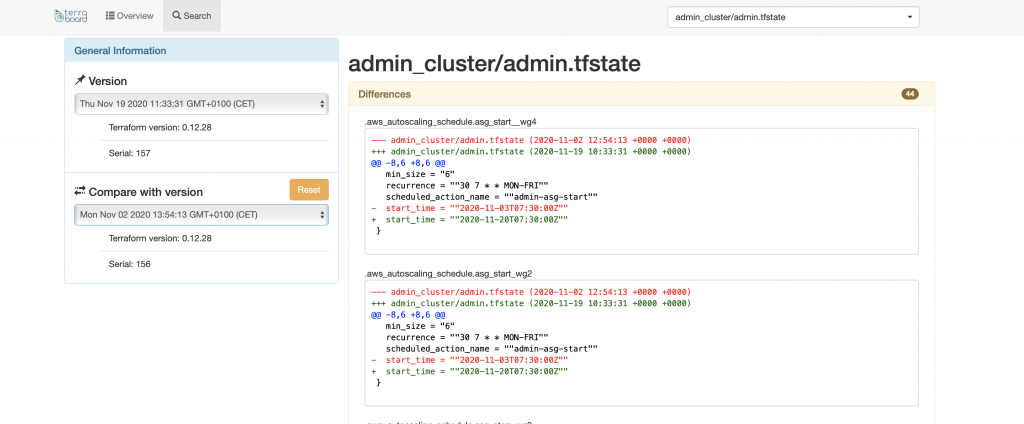
As commented before, Terraboard allows comparing different state versions, which can come in handy to detect the root cause of incidents within the infrastructure.
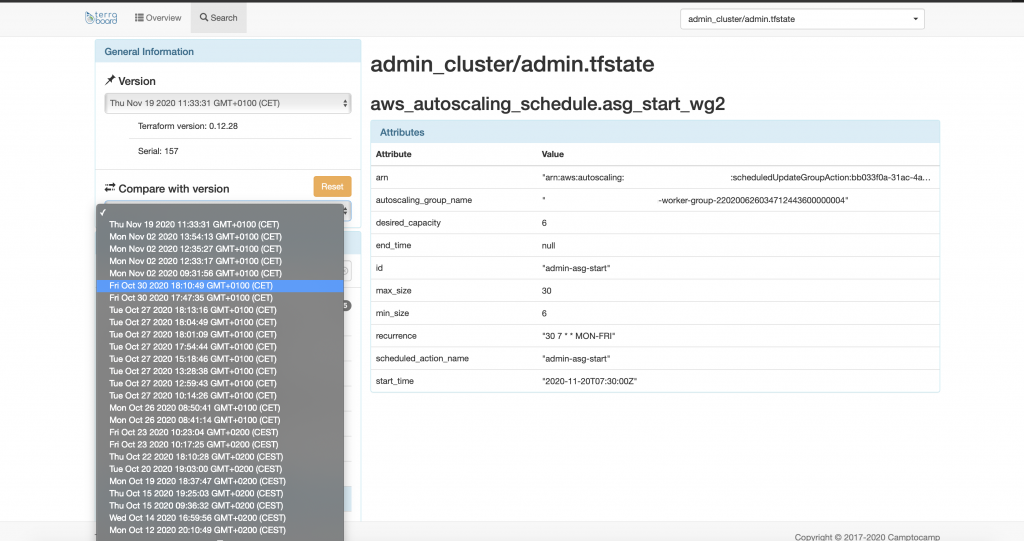
As you can see in the image below, Terraboard provides a git-like diff for the state files.
Once you’re done playing around with Terraboard, you can remove the containers running in your local machine and the associated resources by issuing the following command.
terraboard down
Deploying it to Kubernetes ☸️
In order to make Terraboard accessible to your entire team or other collaborators, you can deploy it to a Kubernetes cluster. A simple Helm chart has been developed for that purpose. To get it deployed, execute the following commands, providing your AWS access key and secret key as extra arguments.
git clone https://github.com/mifonpe/terraboard
cd terraboard/helm
helm install terraboard . --set secrets.aws_key=<your-key> \
--set secrets.aws_secret_key=<your-access-key> \
--set backend.region=<aws-region> \
--set backend.bucket=<your-bucket>
NOTE: this Helm chart assumes that a Nginx ingress controller is already in place. If you don’t have an ingress controller in place, install it with the following command.
helm install ingress bitnami/nginx-ingress-controller