Building container images is a pretty common stage within the modern CI flows, in which these images are the main artifact used to distribute and run apps. Building images in a “classic” way implies using docker as a daemon and the docker CLI. This approach can be easily implemented in local environments, where all you need is a dockerfile, the source code and the dependencies to package.
However, when it comes to building images within a CI system, doing it at scale and in a secure way is not as trivial as it is to do it locally, specially when the CI tools rely on Kubernetes to run their jobs.
As you probably know, each Kubernetes node runs its own container runtime (normally a docker daemon), which receives orders from the Kubelet running in the node. If the CI job in charge of building docker images runs as a container within a cluster, it will need to get access to a docker daemon so that it can build the images.
There are several ways of making this possible:
Exposing the Docker daemon🔓
You can make the docker daemon available to the containers running in the cluster by exposing the docker socket of the node (/var/run/docker.sock), mounting it as a volume in the container. This approach is terribly insecure, as any container in the cluster can access the daemon.
Docker in Docker 🐳
When using docker-in-docker(dind), a specific docker image which runs its own docker daemon is created, and this daemon is the one that is exposed to be used. This approach is a little bit more secure than directly using the node’s daemon but still, it can be pretty dangerous as it could generate problems with with Linux Security Modules (LSM) and with the filesystems of the nested containers. If you want to read more about why not to run docker in docker, check this article.
Just say no to Docker 🤖
Well, it may not be obvious, but the best way to avoid issues using the docker daemon is to just avoid using it. To do so, you can use an image builder that does not need access to the docker daemon like kaniko or buildah. This kind of builders run all the commands that are present in the dockerfile in the user space, not needing host root privileges anyway.
In this article we will focus on kaniko, showing how to set it up for different CI/CD platforms. The code used for the examples can be found in this repository.
Kaniko ⚙️📦
Kaniko was created by Google as a part of the Google Containers Tools, a set of tools which come in handy when working with containers and Kubernetes environments. It builds container images without the need to access the docker daemon, making the build process more secure, as the docker socket is not exposed either directly or indirectly. Kaniko builds each layer of the image using the user space so no privileged access is needed.
The kaniko executor image (gcr.io/kaniko-project/executor) is responsible for building an image from a Dockerfile and pushing it to a registry. It works the following way:
- First, kaniko extracts the filesystem of the base image.
- Then, it executes the commands in the Dockerfile, snapshotting the filesystem in userspace after each one.
- After each command, it appends a layer of changed files to the base image (if there are any) and update image metadata.
The build context 🧱
Like when using a docker daemon to Build an image, kaniko requires a build context, which represents a directory containing a Dockerfile which kaniko will use to build your image and the files that it will need. The context can be specified easily using the --context flag.
You will need to store your build context in a place that kaniko can access. Right now, kaniko supports these storage solutions:
- GCS Bucket
- S3 Bucket
- Azure Blob Storage
- Local Directory
- Local Tar
- Standard Input
- Git Repository (ideal for CI/CD environments)
Kaniko in Kubernetes ☸️⚙️
Kaniko can be run in Kubernetes as a pod as you can see in the snippet below. For this example, we will be using a GitHub repository as a build context and a DockerHub image repository to store the built image. You will find the required components in this repo. If you want to try it you can just fork the repo.
apiVersion: v1
kind: Pod
metadata:
  name: kaniko
spec:
  containers:
  - name: kaniko
    image: gcr.io/kaniko-project/executor:v1.7.0
    args:
    - "--dockerfile=./Dockerfile"
    - "--context=git://github.com/mifonpe/kaniko-examples#refs/heads/main"
    - "--destination=<your-repo>:<your-tag>"
    env:
      - name: GIT_TOKEN
        valueFrom:
          secretKeyRef:
            name: git-token
            key: GIT_TOKEN
    volumeMounts:
    - name: docker-config
      mountPath: /kaniko/.docker/
  restartPolicy: Never
  volumes:
  - name: docker-config
    secret:
      secretName: docker-regcred
      items:
          - key: .dockerconfigjson
            path: config.json
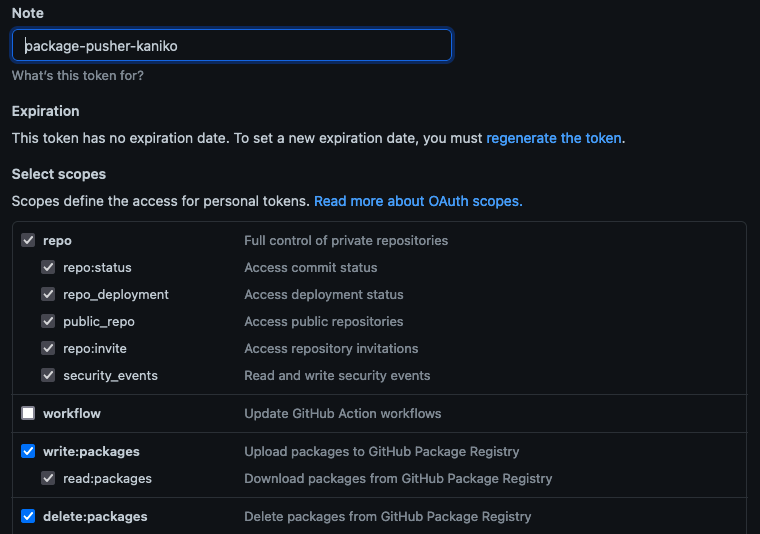
Keep in mind that if you use a private repo you will need to create a token so that kaniko can access it. In GitHub, you can do so by going to Settings > Developer Settings > Personal access Tokens and creating a new token with the following permissions.

Once the token is ready, copy it and create a Kubernetes secret using the token as a literal value.
kubectl create secret generic git-token --from-literal='GIT_TOKEN=<your-token>'
But that’s just half of it, we also need to set up credentials for the image repository. You can do it by creating a kubernetes secret which contains a docker config.json file. If you check the pod definition, you can see how this secret is mounted as a volume under the /kaniko/.docker/config.json path.
kubectl create secret docker-registry  docker-regcred \
--docker-server=https://index.docker.io/v1/ \
--docker-username=<your-username> \
--docker-password=<your-password>
Finally, create the pod.
kubectl apply -f kaniko-pod.yaml
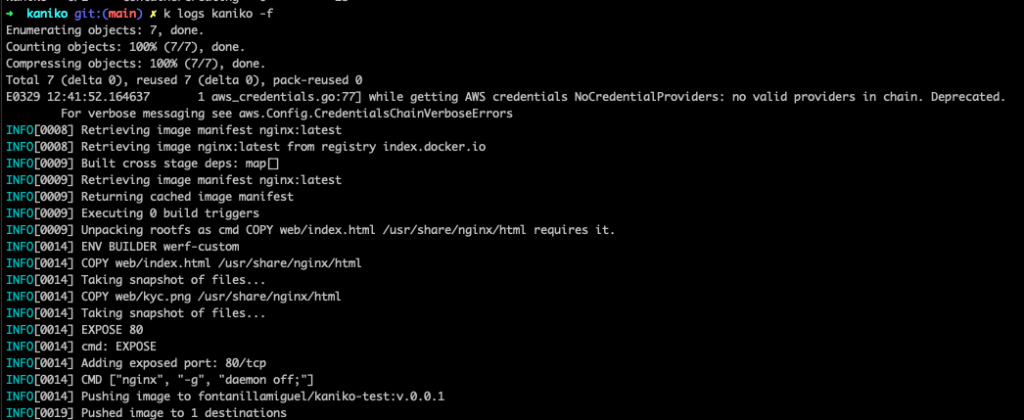
If you check the logs of the pod, you will be able to see how kaniko builds and pushes the image to you repository.
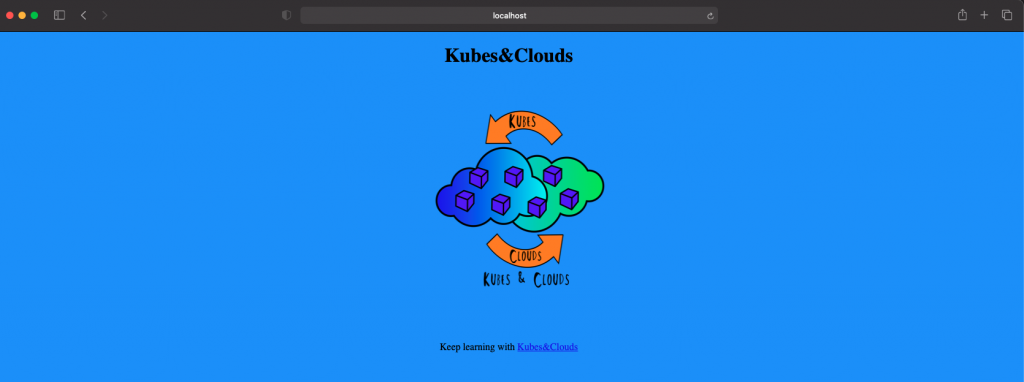
Now, you can test your new image. Run it locally and use your browser to access localhost on the port you want. For this example I used 8082.
docker run -d -p 8082:80 <your-repo>/<your-tag>:v.0.0.1
And voilà, you will get a super cool logo in your browser!
Kaniko in GitHub 🐙⚙️
Kaniko can also be run using GitHub actions. In this case, we will use GitHub as the image registry to store the built image. The snippet below shows the steps needed to build and push an image with kaniko in GitHub. It uses the commit SHA to tag the image built.
name: Commit
on: push

jobs:
  docker:
    runs-on: ubuntu-latest
    name: Build docker image
    steps:
      - uses: actions/checkout@master
      - name: Get short SHA
        id: slug
        run: echo "::set-output name=sha8::$(echo ${GITHUB_SHA} | cut -c1-8)"
      - name: GitHub Package Registry
        uses: aevea/action-kaniko@master
        with:
          registry: docker.pkg.github.com
          password: $
          build_file: ./Dockerfile
          image: nginx-kubesandclouds
          tag: $
          cache: true
          cache_registry: cache
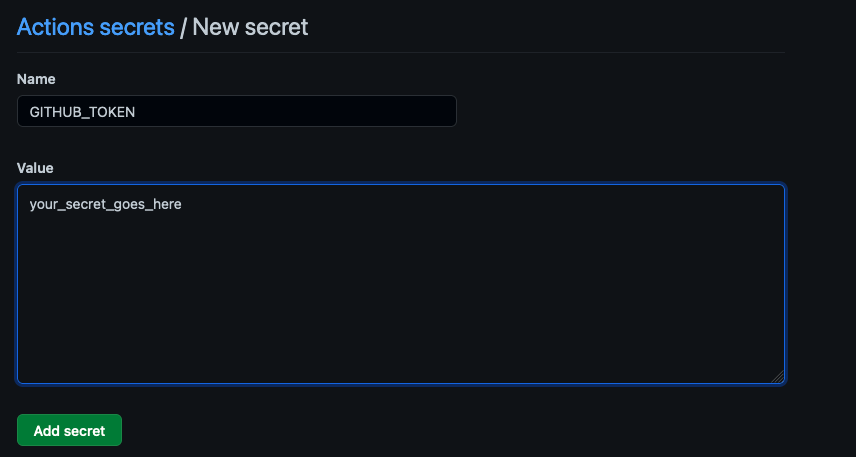
In order to be able to push to the registry, you will need first to create an access token with the following permissions set, and then store it as a GitHub secret. In this case we are using GITHUB_TOKEN as the name of the secret.
Create your secret, and you are good to go.
If everything was configured properly, you should be able to see the pipeline for GitHub actions running when you commit and push to the repo. It will build and push your image.
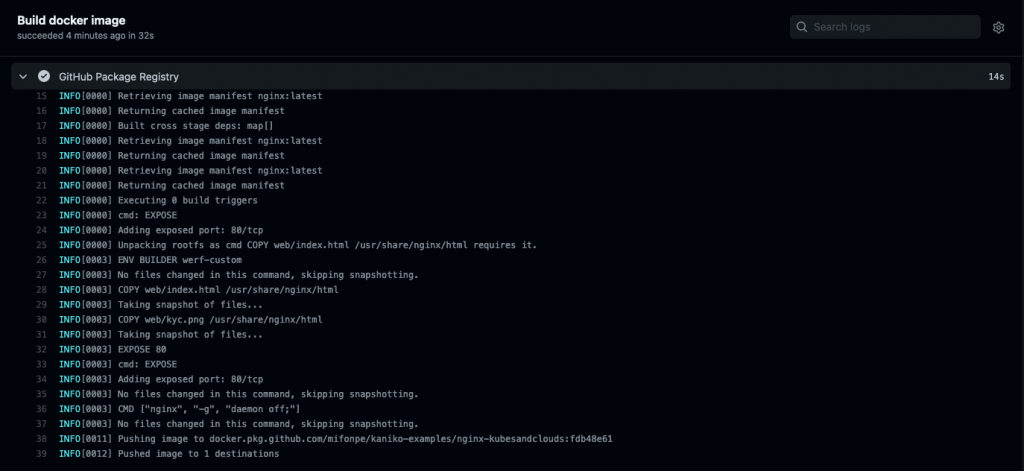
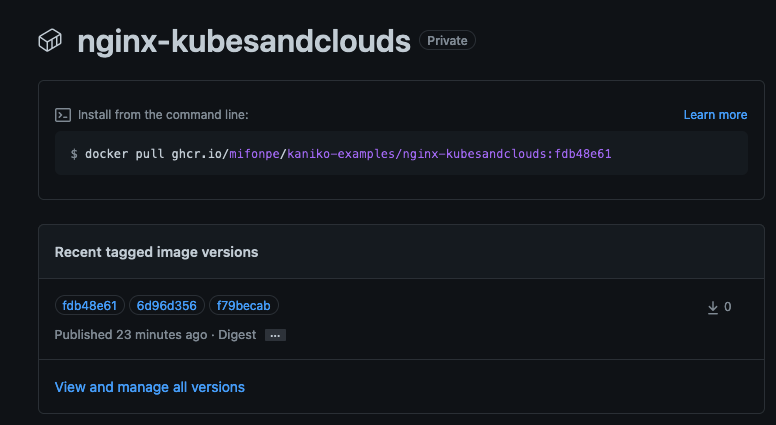
Once the image has been pushed you’re ready to check your newly built image under the packages of your repo!
Kaniko in GitLab CI 🦊⚙️
Kaniko can be also used in GitLab CI eliminating the need for additional docker-in-docker Gitlab Services. You can use Gitlab CI secret variables to store the credentials for your images repo and just reference them in the script. The following snippet shows how to build an image using kaniko and pipeline variables. Besides it uses GitLab’s image registry to store the image that is built.
build:
  stage: build
  image:
    name: gcr.io/kaniko-project/executor:v1.7.0
    entrypoint: [""]
  script:
    - mkdir -p /kaniko/.docker
    - echo "{\"auths\":{\"$CI_REGISTRY\":{\"username\":\"$CI_REGISTRY_USER\",\"password\":\"$CI_REGISTRY_PASSWORD\"}}}" > /kaniko/.docker/config.json
    - /kaniko/executor --context .  --destination $CI_REGISTRY_IMAGE:$CI_COMMIT_SHORT_SHA
As for the GitHub example, you will need to create an access token (Personal Access Token) to be able to push the image to GitLab’s container registry. Grant read_registry and write_registry permissions to the token.
Keep in mind that you will need to create these variables in the CI settings of your GitLab project to be able to use them in the pipelines. Use the token you created and your gitlab username respectively. CI_REGISTRY_PASSWORD is a special environment variable that is retrieved by the pipeline and refers to the registry of the project.
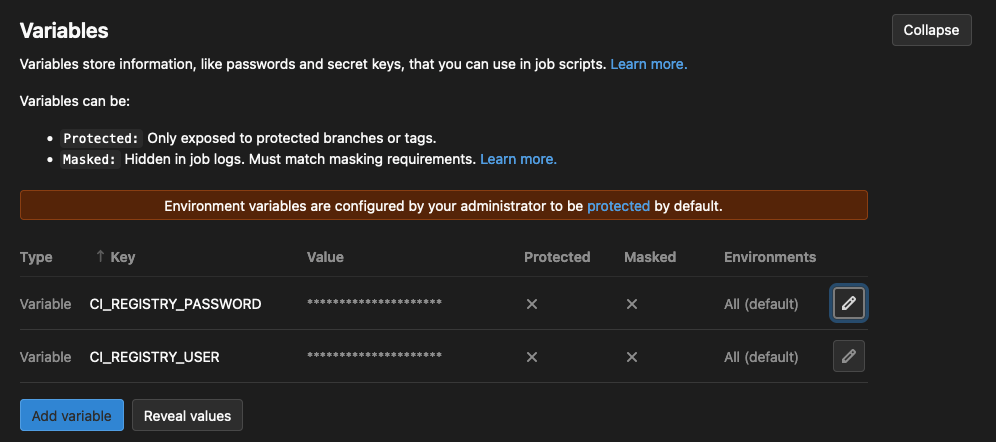
After the pipeline goes through, you should be able to see your image in the container registry.

If you want to know more about how to run kaniko in GitLab CI, check this documentation.
Caching 📚⌛
Kaniko supports layer caching to reduce build times. Thus, image layers created with the Dockerfile RUN and COPY directives can be stored in remote repositories. In each build, kaniko will check these cached layers before building the layer, and if they are available, they will be pulled from the repository.
Caching is enabled by using the –cache=true flag, and the repository to use is specified using the --cache-repo flag. If no cache repository is specified, kaniko will use the image repository to store the cached layers.
The following image shows a GitLab CI pipeline which uses the cache flag for kaniko. Notice how it checks for the previously cached layer in the image repository.
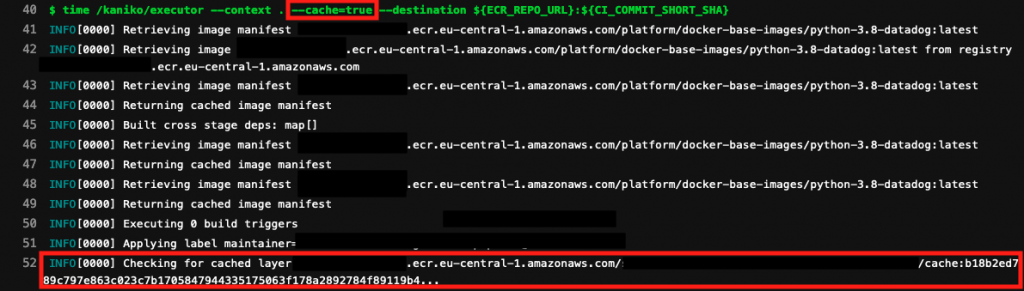
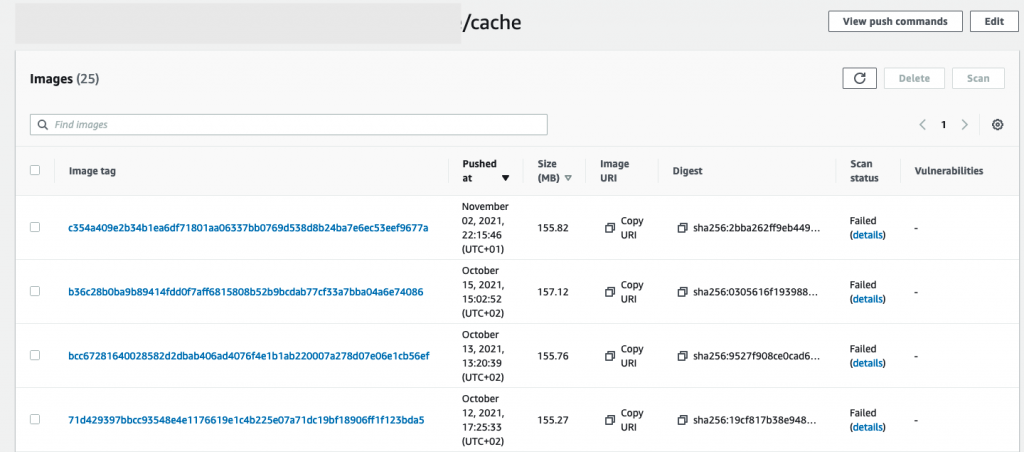
Since no specific repo is provided for the cache layers, kaniko uses the same image repository but adds the /cache path. For this specific setup, we used AWS ECR as the image registry.
Keep learning 👩💻👨💻
If you liked kaniko, take some time to go through its Github repo, as you will better understand all the flags, features and options to adapt it to your environments and needs. You can also find some examples on how to run kaniko here.